nimidesign เว็บพนันบอล ดีที่สุด เล่นได้ทุกที่ ทุกเวลา รายงานผลแบบ Live Score ตลอด 24 ชม. พร้อมรองรับระบบมือถือ เล่นง่าย ได้เงินจริง ฝาก-ถอน สะดวก มีผู้เชี่ยวชาญคอยแนะนำตลอดทั้งวัน

460bet เป็นเลิศในคาสิโนออนไลน์ใหม่ล่าสุดที่มีให้บริการ แต่ได้สร้างชื่อให้กับตนเองว่าเป็นเว็บไซต์เกมที่มีคุณภาพ ด้วยเกมที่นานัปการให้เลือกและเวลาสำหรับเพื่อการฝากและถอนที่เร็ว ก็เลยไม่น่าแปลกใจที่คาสิโนแห่งนี้จะได้รับความนิยมอย่างมาก คาสิโนออนไลน์ประสิทธิภาพ ฝาก - ถอนเร็วเป็นเลิศในคาสิโนออนไลน์ที่น่าไว้วางใจที่สุดในอุตสาหกรรม เราเสนอเกมคาสิโนที่นานัปการและเป็นที่รู้จักว่าเป็นเลิศในคาสิโนออนไลน์ที่น่าไว้วางใจที่สุด คาสิโนออนไลน์ประสิทธิภาพ ฝาก - ถอนเร็วเป็นเลิศในคาสิโนออนไลน์ที่ดีที่สุดที่พวกเราเคยเล่นมา การบริการลูกค้าเป็นเลิศ เกมเป็นอันดับต้นๆและการจ่ายเงินก็เร็วและง่ายดาย พวกเราขอแนะนำคาสิโนนี้ให้กับทุกคนที่กำลังมองหาประสบการณ์การเดิมพันออนไลน์ที่ดีเลิศ
เว็บเกมพนันออนไลน์ของเรา mgm99win ไม่เคยมีประวัติการโกงรับประกันจากฐานลูกค้าที่มีมากกว่าหลักล้านคนภายในไม่กี่ปีที่ผ่านมาท่านจึงสามารถลงเดิมพันได้อย่างปลอดภัยสบายใจหายห่วง จ่ายเต็มราคา 100% ทดลองรับทุกระบบปฏิบัติการไม่ว่าจะเป็น iOS หรือ Android ท่านสามารถลงเดิมพันได้ทางหน้าจอโทรศัพท์มือถือคอมพิวเตอร์ PC แท็บเล็ตหรือ laptop ก็สามารถลงเดิมพันเกมพนันออนไลน์ได้ด้วยเหมือนกัน อีกทั้งยังมีระบบเว็บไซต์ที่ปลอดภัยรับประกันได้เลยว่าข้อมูลของท่านจะไม่รั่วไหลสู่สาธารณะชนอย่างแน่นอน ด้วยระบบเว็บไซต์ที่เยี่ยมที่สุดที่สุดอีกทั้งมีทีมงานมือโปรที่คอยให้บริการอย่างต่อเนื่อง ท่านสามารถติดต่อกับบุคลากร Admin เว็บไซต์ของเราได้โดยตรงผ่านทาง Application LINE และ Facebook สามารถสอบถามได้อย่างต่อเนื่องตลอดเวลา ไม่มีวันหยุด พร้อมแก้ไขปัญหาให้คุณได้อย่างทันท่วงที การบริการที่ดีที่สุดที่ปีทำรายการได้ฟรีเป็นกลางปลอดภัยไม่มีโกงสามารถลงเดิมพันได้ง่ายๆได้ที่บ้านไม่มีความจำเป็นที่จะต้องสิ้นเปลืองค่าพาหนะหรือค่าพาหนะใดๆ ด้วยเกมพนันออนไลน์ที่เข้าถึงง่ายที่สุด

ได้รับการออกแบบมาพร้อมกับระบบรักษาความปลอดภัยระดับแนวหน้าที่ตรวจสอบและอัปเกรดอย่างตลอดเพื่อปกป้องผู้ใช้จากภัยคุกคามที่บางทีอาจเกิดขึ้น มันใช้เทคโนโลยีการเข้ารหัสล่าสุดและกรรมวิธีตรวจสอบหลายสาเหตุเพื่อให้แน่ใจว่าข้อมูลที่เป็นความลับของคุณปลอดภัย นอกเหนือจากนั้น ระบบไฟร์วอลล์ระดับสูงยังคุ้มครองกิจกรรมที่เกิดอันตรายและการเข้าถึงโดยไม่ได้รับอนุญาต นอกเหนือจากนั้น pgslot99 ได้ใช้ความระแวดระวังเป็นพิเศษในการตรวจสอบตัวตนและธุรกรรมทางการเงินของผู้เล่นทั้งหมดผ่านแนวนโยบาย KYC (รู้จักลูกค้าของคุณ) สิ่งนี้ทำให้มั่นใจได้ว่าไม่มีใครใช้เว็บไซต์เพื่อกิจกรรมที่ไม่ถูกต้องตามกฎหมาย ไม่เพียงแต่เป็นที่รู้จักในด้านระบบความปลอดภัยสูง แต่ยังรวมถึงการเลือกเกมสล็อตที่น่าทึ่งอีกด้วย บนเว็บไซต์ ผู้เล่นสามารถค้นหาเกมสล็อตคลาสสิกและยอดฮิต รวมถึงโปรเกรสซีฟแจ็คพอตที่หลากหลาย เกมทั้งหมดนี้มาพร้อมกับสิ่งแวดล้อมของเกมที่ปลอดภัยและไว้ใจได้ เพื่อผู้เล่นรู้สึกปลอดภัยในการเดิมพันและสนุกสนานไปกับความสนุกสนานร่าเริงของสล็อต เว็บไซต์ยังแจ้งให้ผู้เล่นรู้ถึงโบนัสและโปรโมชั่นต่างๆเพื่อผู้เล่นไม่เสียโอกาสที่จะชนะรางวัลใหญ่ ผู้เล่นยังสามารถค้นหาเจ้าหน้าที่บริการลูกค้าที่มีประโยชน์และส่วนคำถามที่พบบ่อยในเว็บไซต์ ซึ่งช่วยทำให้ประสบการณ์การเล่นเกมมีความปลอดภัยและวางใจได้มากเพิ่มขึ้น
การเล่นเกมสล็อตออนไลน์บน joker123 ให้ผลดีมากมาย ประการแรก คุณจะเพลิดเพลินไปกับความสะดวกสบายในการเล่นสล็อตออนไลน์ที่บ้านของคุณเองอย่างสะดวกสบาย ประการที่สอง คุณจะสามารถสนุกกับการเล่นหลายๆสล็อตในครั้งเดียวและสามารถแปรไปเล่นเกมต่างๆได้เมื่อคุณรู้สึกถูกใจ ประการที่สาม การเล่นสล็อตออนไลน์ยังมอบโอกาสให้ผู้เล่นได้เล่นเกมที่ดีที่สุด โบนัส และลักษณะเด่นที่มีอยู่ สุดท้ายการเล่นสล็อตออนไลน์ยังช่วยให้คุณได้รับประโยชน์จากโปรโมชั่นและคำแนะนำโบนัสมากมายที่สามารถรับได้ในขณะเล่น ข้อดีทั้งหมดนี้ทำให้เกมสล็อตออนไลน์เป็นตัวเลือกที่น่าสนใจสำหรับผู้เล่น


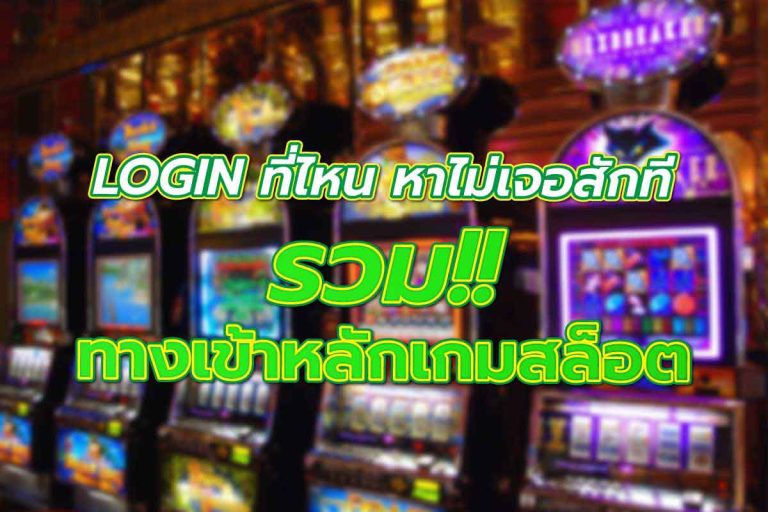
สล็อต ฝากขั้นต่ำ 1 บาท เว็บตรง pgdragon เป็น แพลตฟอร์ม สล็อตออนไลน์ ที่ น่าตื่นตาตื่นใจ นำเสนอ เกมสล็อตคลาสสิก ที่ สนุก และ หลากหลาย ด้วยการ ฝากขั้นต่ำ 1 บาท เป็นเว็บไซต์ ที่ ปลอดภัย และ เชื่อถือ ได้ สำหรับ นักเล่นเกม โดย มี สล็อตให้เลือก มากมาย โดย ไม่ต้อง ดาวน์โหลด การลงทะเบียนที่ง่ายดายและอินเทอร์เฟซการเล่นเกมที่ใช้งานง่ายทำให้เหมาะสำหรับนักเล่นเกมทุกชนิด มีโบนัส โปรโมชัน และรางวัลวีไอพีมากมายเพื่อยกระดับประสบการณ์การเล่นเกม เกมทั้งหมดผ่านการทดสอบและยืนยันความเที่ยงธรรมและความปลอดภัย ทีมสนับสนุนลูกค้าพร้อมให้บริการทุกวันตลอด 24 ชั่วโมงเพื่อช่วยเหลือผู้เล่นเมื่อมีคำถามหรือข้อกังวลใดๆ ด้วยตัวเลือกการฝากและถอนที่หลากหลายประสบการณ์การเล่นเกมที่ปลอดภัยและสนุกสนานที่สุดสำหรับแฟนสล็อตเกมคาสิโนออนไลน์ที่ให้ประสบการณ์การเล่นเกมที่น่าเร้าใจแก่ผู้เล่นคาสิโนออนไลน์ที่ให้ผู้เล่นได้โอกาสเล่นสล็อตด้วยการฝากขั้นต่ำ 1 บาท นี่เป็นคุณสมบัติที่น่าสนใจสำหรับผู้เล่นที่กำลังมองหาวิธีเสี่ยงต่ำในการเดิมพัน เว็บไซต์ให้บริการแพลตฟอร์มที่ปลอดภัยสำหรับผู้เล่นในการเล่นและให้บริการสล็อตที่มีธีม สไตล์ และโบนัสที่แตกต่าง ผู้เล่นยังสามารถใช้ประโยชน์จากทีมเกื้อหนุนลูกค้าที่พร้อมให้บริการทุกวันตลอด 24 ชั่วโมงเพื่อตอบคำถามใดๆก็ตามตัวเลือกที่ยอดเยี่ยมสำหรับผู้เล่นที่กำลังมองหาประสบการณ์สล็อตที่น่าตื่นเต้นด้วยเงินฝากที่ต่ำ
สล็อตออนไลน์ betflik168 เป็นรูปแบบการเดิมพันที่ได้รับความนิยมชมชอบ โดยมีผู้เล่นจำนวนมากที่มองหาประสบการณ์การเล่นเกมที่น่าเชื่อถือและปลอดภัย เลือกเว็บสล็อตที่ดีมีใบอนุญาตการพนันออนไลน์ที่ไม่ผิดกฎหมาย ซึ่งช่วยให้มั่นใจได้ว่าเว็บไซต์ได้รับการตรวจสอบและอนุมัติโดยหน่วยงานกำกับดูแล สิ่งนี้ทำให้ผู้เล่นสบายใจได้ว่าข้อมูลส่วนบุคคลและข้อมูลทางการเงินของพวกเขาปลอดภัย และเกมสล็อตนั้นเที่ยงธรรม ผู้เล่นสามารถใช้ใบอนุญาตการเดิมพันออนไลน์ที่ถูกต้องตามกฎหมายเหล่านี้เพื่อค้นหาประวัติความเป็นมาของเว็บไซต์ นโยบายการเล่นเกมที่มีความรับผิดชอบ และความตั้งใจต่อการพนันที่มีความรับผิดชอบ ใบอนุญาตการพนันออนไลน์ที่ถูกตามกฎหมายยังช่วยให้แน่ใจว่าผู้เล่นจะสามารถเข้าถึงการสนับสนุนลูกค้าและการหยุดข้อโต้เถียงได้หากจำเป็นต้อง สิ่งนี้จะช่วยลดการเสี่ยงของการฉ้อโกงและทำให้ผู้เล่นได้รับประสบการณ์การเล่นเกมออนไลน์ที่ปลอดภัยและสนุกสนาน การเลือกเล่นจากค่ายสล็อตที่เชื่อถือได้และมีชื่อเสียงระดับโลกเป็นการดำเนินการที่ชาญฉลาดสำหรับนักการพนันออนไลน์ betflik168 เว็บไซต์พวกนี้มีประสบการณ์หลายปีในการมอบประสบการณ์การเล่นเกมที่ปลอดภัย มั่นคง และสนุกสนานแก่ลูกค้า พวกเขายังมีเกมล่าสุดและเกมที่ได้รับความนิยมให้เลือกมากมาย รวมถึงเกมใหม่ล่าสุดจากนักพัฒนาชั้นนำ นอกจากนั้น ทีมบริการลูกค้าของพวกเขายังมีความสามารถและเต็มใจเสมอที่จะช่วยเหลือผู้เล่นในการค้นหาเกมที่เหมาะกับความจำเป็นในการเล่นเกมของพวกเขามากที่สุด ด้วยแหล่งข้อมูลที่น่าเชื่อถือและเชื่อถือได้สำหรับเกมออนไลน์ ผู้เล่นสามารถวางใจได้ว่าความ


พร้อมไปเดิมพันออนไลน์กับเว็บไซต์เดิมพันมาตรฐานระดับโลกหรือยัง? สมัครเป็นสมาชิก UFABET เข้าสู่ระบบ ได้จากทุกที่ พร้อมให้บริการเดิมพันดีๆแก่สมาชิกทุกวัน แบบไม่มีวันหยุด ที่นี่เรามีให้ครบ ไม่ว่าจะเป็นโปรโมชันดีๆทดลองเดิมพันฟรีก็มีให้ครบทุกเกม ไม่เพียงเท่านั้น แต่เรายังมอบประสบการณ์เดิมพันอันน่าตื่นเต้นเร้าใจให้นักเดิมพันอีกด้วย เหมือนได้รับประสบการณ์ไปเดิมพันที่คาสิโนออนไลน์จริงๆใครที่ยังไม่เป็นสมาชิกเว็บไซต์เดิมพันออนไลน์ของเราก็อย่ารอช้า รีบมาสมัครใช้งานกันได้เลย